How To Transfer ZX Spectrum Programs From Cassette Tape To Computer TZX Files
This article describes an effective method to transfer ZX Spectrum programs from cassette tape to a computer and convert those files for storage in the TZX file format.

ZX Spectrum Programs Stored on a WH Smith C15 Computer Cassette
Once preserved as TZX files, ZX Spectrum programs can be enjoyed on modern hardware capable of running ZX Spectrum emulators.
About This Guide:
This file transfer and conversion guide is based on a PC running Windows 10 in conjunction with the MakeTZX decoding engine by Ramsoft.
It records the steps I took to salvage all of my ZX Spectrum BASIC programs from tape that I wrote in the early eighties.
Hopefully, in following this guide, you should avoid the stumbling blocks I encountered and save yourself a lot of wasted time.
You are advised to read through this document in full before commencing in order to understand the process and gather the materials you need.
Enjoy this archiving process and looking through your old code!
Good luck!
1. What You Will Need To Transfer ZX Spectrum Programs From Cassette Tape To Your Computer And Convert Them To The TZX File Format
- A cassette tape containing ZX Spectrum games / programs.
- A cassette tape player with an amplified output connection; a headphone socket or similar.
- A computer running Windows or a Linux operating system. The computer must have a Line-In connector.
- A suitable cable to connect your cassette tape player to the Line-In connector on your PC.
- Ramsoft’s MakeTZX software, appropriate for your operating system.
- Software to analyze and edit audio wave files.
- A ZX Spectrum emulator for your operating system.
1.1 Cassette Tape Containing ZX Spectrum Programs
Your cassette tape may be more than three decades old if it has had the good fortune of surviving from the early eighties. Certainly, you need to treat it with care as it is unlikely that you will have the data it contains backed up on another tape.
Assess the condition of the cassette and the tape itself by inserting a pen into one of the spools and rotating it in the direction of normal tape transport. Repeat the process with the pen in the second spool to transport the tape in the opposite direction. Before proceeding, look for loops of tape that may have been thrown off the wound spools during storage.
Ensure the tape is wound properly on both spools before inserting it into a cassette tape player.

Turning a Cassette Tape Spool With A Pen
With the cassette inserted in a cassette tape player, fast forward the tape fully to one end, then rewind the tape completely.
1.2 Selection Of Cassette Tape Player
I found this to be the largest obstacle in achieving reliable data transfer from tape to computer. Why?
- Households today are no longer abundant with cassette tape players, so choice is limited.
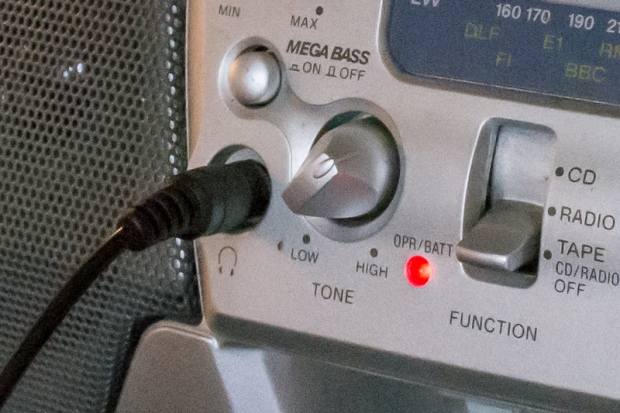
- More recent cassette deck technology, that was not around in the eighties, may interfere with the signal being played back. Disable features such as Loudness, Mega Bass, DSGX, EQ, etc…

Disable Modern Features Such As Mega Bass
- Less expensive cassette players may be built from cheap electronic parts that introduce noise and cause errors during data transfer. This particular issue cost me lots of time during this project. Shown below is an example of DC offset and noise caused by a poor tone control circuit of a cassette player that I tried to use.
- Avoid using a hi-fi separate cassette deck without an amplifier. The output is unlikely to have sufficient and controllable gain on its own for good data transfer.

AKAI Stereo Cassette Deck HX-1
1.3 Identify The Line-In Connection Of Your Computer
Computer Line-In connections are typically made to accept 3.5mm stereo jacks.

Computer Line-In Connection
Line-In connections are normally labelled on your computer and are therefore relatively easy to identify. Examine your computer / motherboard manual if you are unsure of the location.
1.4 Connect The Cassette Deck To Your Computer
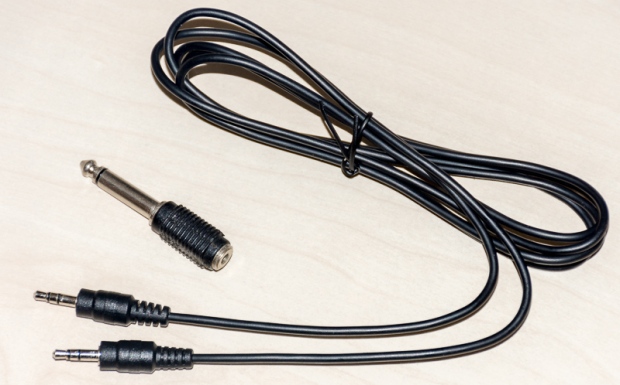
Using a suitable cable, connect your cassette tape player to the Line-In connection of your computer.

3.5 mm Stereo Phono Jack Cable And Adapter Plug
It is best to connect to an amplified output of the cassette deck so that signal levels can be adjusted with the volume control prior to data transfer. The headphone socket is usually a good choice.

Headphone Socket To Line-In
You may require phone jack adapters or a cable with specific jacks to enable the connection.
1.5 Download The MakeTZX Software
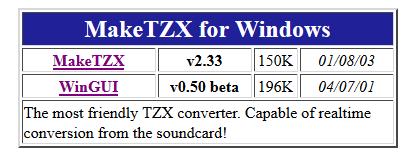
Visit Romsoft’s MakeTZX Homepage and download the appropriate software for your system.
Versions of MakeTZX are available for Windows, DOS, Linux x86 and Amiga from the MakeTZX Download Center.
If you have a Windows operating system, download the two compressed files, MakeTZX and WinGUI.

Download Both MakeTZX Files For Windows Operating Systems
Uncompress both zip files. This will result in two separate folders. Then, move / copy the contents of one folder to the other so that all the following files are contained in one folder.

Merge The Contents of Both Folders | MakeTKZ Windows
Make a note of the folder’s name or rename the folder if you prefer. This will be your working folder. This software requires no installation and can be run directly from this folder.
The file mtzxwgui.exe is a Windows graphical user interface designed to simplify configuration of the DOS-based sampler and TZX encoder, maketzx.exe
The file mtzxman.htm is the user manual for MakeTZX and can be viewed in your default web browser by double-clicking it.
1.6 Audio / Wave Editor
Although not essential, it is beneficial to have an audio / wave editor installed on your computer to assist with signal analysis, fault finding and editing.
Audacity is free, open source, cross platform software for recording and editing sounds. Audacity will run on Windows, Linux, Mac and other operating systems. It is highly recommended.
1.7 ZX Spectrum Emulator
There are many, free ZX Spectrum emulators available for all types of hardware and operating systems.
Recommended ZX Emulators:-
Download the ZX Spectrum Emulator – Spectacol – Android Apps from the Google Play store.
Download FUSE – ZX Spectrum Emulator for Linux, Windows, OS X and many other operating system.
Alternatively, use your favorite ZX Spectrum emulator. Just make sure that it is able to load TZX files.
2. How To Use MakeTZX To Transfer ZX Spectrum Files From Cassette Tape To Your Computer And Convert Them To TZX Files
2.1 MakeTZX Help File
The help file, mtzxman.htm, as described in Step 1.5, is comprehensive and explains everything you need to know about MakeTZX. You may need to refer to this document if the conversion process fails at some point.
2.2 MakeTZX | Sampling Your Cassette Tape & TZX Encoding
Double click mtzxwgui.exe to launch the Graphical User Interface (GUI).
Enter a name for your Output file (TZX), i.e. OUTPUT.
Enable DirectMode and check Save WAV file.
Change the sampling rate to 48000 Hz.
DirectMode means that MakeTZX will use the Line Input of your sound card to capture and convert the input signal in real time.

MakeTZX WinGUI | Configuration for Sampling and Encoding
Press the Start button. This will launch maketzx.exe in a console window with the configuration set in the GUI.
Upon launch, you are invited to set the input signal level from the cassette tape player to an appropriate level; a level high enough to have a good signal to noise ratio but not so high that signal clipping (distortion) occurs. Press Play on your cassette tape player and you should start to see the signal strength of the recording displayed dynamically on the text-based vu-meters.
Adjust the volume of the cassette tape player so that the signal strength is high but does not exceed the text Volume] within the vu-meter. Signal strength greater than this will result in clipping and is detrimental to data transfer.
Once you are satisfied with the signal levels, Stop and Rewind the tape.
With the console window selected, press Return to start the sampling and conversion. Now press Play on the cassette tape player.
MakeTZX will now search for pilot header tones and data as the tape recording is played back. Details of program headers, and data blocks will be reported as the cassette tape plays. It is recommended to keep the cassette tape playing until you are certain that no more data exists on the tape. At that point, press Stop on the cassette tape player and with the console window selected, press a key to terminate sampling.
The output in the console window should look something like this:
The information displayed includes where data blocks start and stop, header lengths, the gap duration between data blocks (in milliseconds), program names, data files (“Bytes”) and any errors encountered.
At this point it is worth noting down these details by either copying the text in the console window to a text file or by capturing the console output as an image for reference later.
Notice that two files have been generated in your working folder; one is an uncompressed audio recording of the playback (.wav file) and the other is a .tzx file.

MakeTZX Output Files
Opting to save a digitized audio file is beneficial in removing any encountered errors without the need to re-sample from the cassette tape again. Details are provided towards the end of this document in section 2.5.
2.3 Testing The TZX File
TZX files store programs and data in the same sequential order that they were stored on cassette tape.
If a file association exists between your ZX Spectrum emulator and the extension .tzx, double-clicking a TZX file should open your ZX Spectrum emulator and then load the first program it encounters.
If no association exists, open your ZX Spectrum emulator, File > Open > your.tzx will load and run the first program in the sequence of programs.
If you want to load a program other than the first, open your ZX Spectrum emulator and go to Media > Tape > Open
Select the TZX file.
With the ZX Spectrum emulator window selected, press J , Ctrl+P, Your Program Name, Ctrl+P
This results in:
LOAD “Your Program Name“ and the flashing L cursor.

ZX Spectrum LOAD Program
Press Return to load your program.
2.4 One TZX File For One Program
If you would prefer to make a TZX file for just program, this can be achieved by either:
- Re-sampling that one program from cassette tape.
- Cutting the program data from the digital audio file and submitting that data to maketzx.exe to make a new TZX file.
I found the latter to be the easiest and fastest method as it is time consuming to position the cassette tape accurately to sample a program mid-tape.
Using your preferred audio editor, load your sampled audio (.wav) file.

ZX Spectrum Programs & Data Sampled From Cassette Tape By MakeTZX
Using the output that you saved earlier from the maketzx console window, you should be able to determine where your program resides in the wave form, based on the gaps between data blocks.
Highlight the section of the wave form that you wish to save and File > Save Selection As… to save an audio file of your selected program.
Alternatively, rename your file then delete portions of the wave form you don’t need until you are left with your program data.
Tip! Remember that a header precedes any program or data block and all associated data needs to be saved. The example below depicts two ZX Spectrum programs as audio waves. The top trace consists of a program header, which contains the name of the program. It is then followed by the program itself. This is a typical example of a simple ZX Spectrum BASIC program.
The bottom trace is one program but is more complex than the previous example as it consists of many data blocks and headers:-
- Program header containing the name of the program
- A short BASIC loader
- A bytes header
- Binary data (this could be a full screen picture, graphics data or machine code)
- Program header
- Program data
- Bytes header
- Binary data
All of these need to be selected to produce a working TZX file.

ZX Spectrum Data
Launch the MakeTZX Win GUI and press the Browse button. Choose the modified audio file that you wish to convert. Ensure DirectMode is Disabled and click Start.

MakeTZX Win GUI Convert Audio File
MakeTZX will then convert your audio file to a TZX file and output the details in the console window.

MakeTZX | One Program One TZX File
Test the generated TZX file by double clicking it or by loading it as tape media in your ZX Spectrum emulator.
2.5 MakeTZX | Removing Errors
MakeTZX incorporates an arsenal of powerful digital filters that are able to rectify many of the problems found on old tapes. The filters are explained in detail in section 11 of the user manual.

R Tape loading error, 0:1
If you encounter a R Tape loading error, 0:1, load the wave file into MakeTZX WinGUI and enable the Digital Filter with the default settings. Ensure DirectMode is disabled then press Start to generate a new TZX file.

MakeTZX Digital Filter Enabled
Refer to the accompanying documentation to determine what digital filters could work for your situation.
Also note that if you are attempting to transfer and convert a commercial game with this method, check Autodetect loader to circumvent the multitude of protection schemes that were used to prevent piracy.
If all else fails, re-sample the cassette tape recording with a different output level.


