ZD V Full Vibration Feedback 2.4GHz Wireless Controller Gamepad Joystick for PC (Windows XP/7/8/8.1/10), the PlayStation 3, Android devices and Steam.
For the sake of clarity, this is a review of the ZD V Full Vibration Feedback 2.4GHz Wireless Controller Gamepad Joystick for PC (Windows XP/7/8/8.1/10), the PlayStation 3, Android devices and Steam. It was purchased with hard-earned cash, so this review reflects that in terms of value for money.
The controller was purchased to compliment a RetroPie set-up and for occasional use with games on Steam.
The ZD V Full Vibration Feedback 2.4GHz Wireless Controller Gamepad Joystick is designed and manufactured by Dongguan Zhi Dong Electronic Technology Co. Ltd. in China. They are Amazon Marketplace Sellers and offer an incredible piece of gaming hardware for the money. A wired version of this model is also available with the same features as the wireless one. Both controllers are Plug and Play and PC fully compatible. They both contain a 360 core, which means that they are recognized as XBOX 360 controllers.
Check prices on amazon.co.uk:-
 & PlayStation 3 & Android&Steam - Not support the Xbox 360/One")
ZD V Full Vibration Feedback WIRELESS Controller Gamepad Joystick
 & PS3 & Android (PS architecture) - [Black]")
ZD V Full Vibration Feedback WIRED Controller Gamepad Joystick
Packaging
The ZD V Full Feedback wireless controller arrives quickly and is packaged in a brown cardboard box when ordered from Amazon. Inside is the blue cardboard box that houses the wireless controller and its accessories.
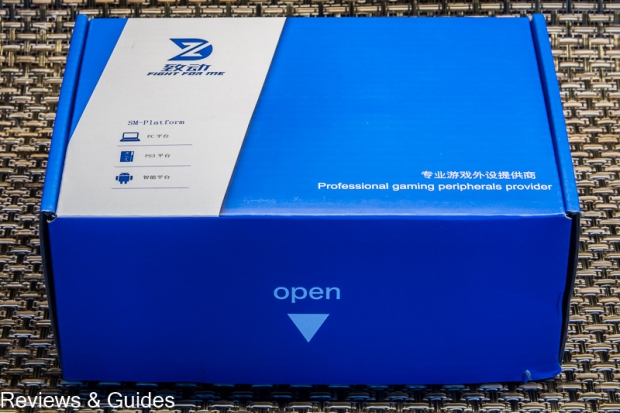
Packaging: ZD V Full Vibration Feedback Wireless Controller Gamepad Joystick
Two polystyrene inserts protect the ZD V wireless controller during shipping. You will find the controller in a plastic bag (not shown) for additional protection. The palm grips of the controller are protected further with easy-to-remove plastic film.

Inside the Box: ZD V Full Vibration Feedback Wireless Controller Gamepad Joystick
Inside the box are the ZD V Full Vibration Feedback 2.4 GHz Wireless Controller GamePad Joystick itself and a second bag containing a 2.4GHz USB dongle; a USB to micro USB cable; a USB to micro USB adapter to enable connection to Android devices, and a folded piece of paper containing the operating instructions, product specifications and manufacturer details.
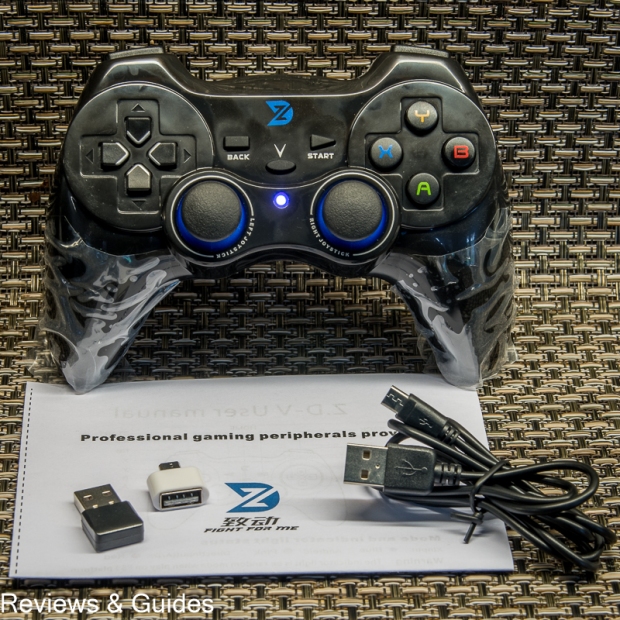
Contents: ZD V Full Vibration Feedback Wireless Controller Gamepad Joystick
Manufacturer Details & Product Specifications:
- Dongguan Zhi Dong Electronic Technology Co. Ltd., China.
- Model: ZD-V208
- Product size: 156 x 105 x 65mm
- Working modes: XInput / Direct Input / Android
- Interface: USB 2.0 / 3.0
- Product weight: 210g
- Battery: Non-accessible, rechargeable polymer lithium battery.

ZD V Full Vibration Feedback Wireless Controller Gamepad Joystick
Features & Operation
The ZD V Full Vibration Feedback 2.4GHz Wireless Controller Gamepad Joystick is equipped with the following buttons, triggers and joysticks:
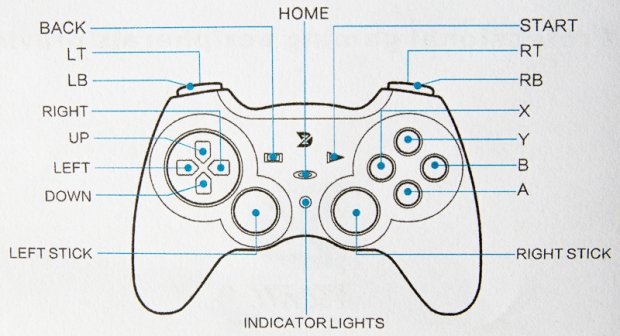
Controls: ZD V Full Vibration Feedback Wireless Controller Gamepad Joystick
Both the LEFT STICK and RIGHT STICK are stick buttons and can therefore be clicked: LSB and RSB.
The trigger buttons [LT & RT] feel like single click buttons. They are, in fact, pressure sensitive buttons that provide linear graduation through pressure sensing. This means that the harder you press them, the greater the input value sent to your game. This feature means that the gamepad can be used in conjunction with racing games that require progressive braking and acceleration, or shooting games, where a one click shot is all that is needed.

Shoulder and Trigger Buttons – ZD V Full Vibration Feedback Wireless Controller Gamepad Joystick
Integral Rechargeable Battery
A micro USB port, located in between the shoulder and trigger buttons, is used to charge the on-board lithium battery and connect the controller to an Android device. The battery can be charged by connecting the device to a suitable 5 volt power supply via the supplied USB cable. A computer USB port or mobile phone charger will suffice. A charging unit is not supplied with the product, presumably to keep the cost of the units low.
The ZD V Full Vibration Feedback 2.4 GHz Wireless Controller GamePad Joystick is shipped with the battery partially charged. The temptation is to start using the game controller straight out of the box without fully charging the battery. I encountered numerous problems when I did just this, problems that disappeared when the device was fully charged later.
Since the lithium battery is integral with the controller, this means that it cannot be changed easily.
Important points for consideration are these:-
- If the battery runs flat during a gaming session, the battery cannot be replaced. Instead, you would have to connect the controller to a charger, which means that you are now tethered to your charger until the battery has sufficient juice for you to remove it.
- Lithium batteries have a finite lifespan due to the repetitive cycle of power depletion and recharging. When the battery begins to fail to hold charge for a decent period of time, then changing it may be difficult and expensive.

Rear View: ZD V Full Vibration Feedback Wireless Controller Gamepad Joystick
After a full charge, the ZD V Full Vibration Feedback 2.4 GHz Wireless Controller GamePad Joystick battery power lasts for a considerable amount of time. On a full charge, the battery lasts between 8 and 15 hours of continuous game play. These figures are in line with the published specifications.
Connection
Connection to gaming hardware if relatively simple. Just insert the wireless USB dongle into a USB port of your gaming equipment and select the operation mode of the gamepad with the HOME button.
On a PC platform, the gamepad is Plug and Play – except for Windows XP. For use on Windows XP, you will need to download and install the 360 controller driver from Microsoft’s official website before plugging in the USB dongle.
PS3 and Android platforms are Plug & Play.
How to Turn the ZD V Full Vibration Feedback 2.4GHz Wireless Controller Gamepad Joystick ON and OFF
- TURN ON: Press the HOME button.
- TURN OFF: Long press the BACK & B buttons together. Alternatively, the gamepad will automatically turn off after a reasonable time of inactivity.
Mode and Indicator Light Status
Press the HOME button to cycle through the input modes compatible with your device. The colour of the indicator light specifies what mode the gamepad is in.
The indicator light will flash until it detects a suitable driver on your gaming system. The indicator light will then shine constantly. Modes can be forced by long holding the HOME button.

Input Modes: ZD V Full Vibration Feedback Wireless Controller Gamepad Joystick
- Use the XInput mode to enable the full vibration feedback feature. It is recommended for PC / XBOX360 games that have been written to provide vibration feedback.
- Use the Direct Input mode for the PS3 and other platforms like the Raspberry Pi.
- Use the Android mode when paired with an Android device.
Note: the full vibration feature will only work in XInput mode AND when the games have been written to support it.
Exchange D-PAD and LEFT STICK Functions
A great feature of this gamepad is that the D-PAD and LEFT STICK controls can be swapped easily, back and forth, by pressing BACK and the LEFT STICK BUTTON at the same time.
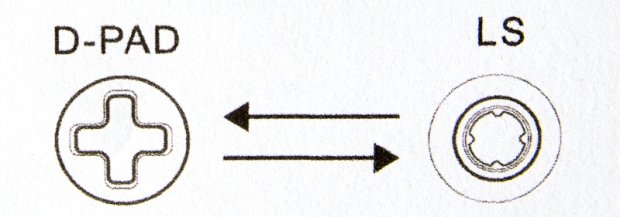
D-PAD LEFT STICK Exchange: ZD V Full Vibration Feedback Wireless Controller Gamepad Joystick
If you want to use the ZD V Full Vibration Feedback 2.4GHz Wireless Controller Gamepad Joystick with RetroPie on the Raspberry Pi, then this function is fantastic for choosing the optimal left thumb controller for a particular ROM, quickly.
Conclusion
The ZD V Full Vibration Feedback 2.4 GHz Wireless Controller GamePad Joystick is rich with useful features that make it a versatile gaming accessory. With its 360 core and its range of compatibility modes, it can be used in conjunction with many gaming platforms. And, being a wireless controller means that you will not be tethered to your gaming hardware and restricted in range as you would be with its wired counterpart.
This gamepad feels good in the hands of both adults and children. It has been designed and produced to a quality resembling that of a PS3 controller. The construction is good; the buttons respond well and the joysticks work with precision.
Positives:
- A versatile wireless controller with a XBOX 360 core, resulting in cross-platform compatibility. Fully compatible with PC, PS3, Android and other devices using Direct Mode.
- Full vibration feedback when used in conjunction with compatible games.
- Integral battery with continuous play time of 8 to 15 hours.
- JD-Switch: The ability to swap the D-PAD and LS controllers in-game.
- LT & RT are pressure sensing switches. This means linear and precise control in racing games is possible, depending on how you press.
- Very good build quality, resembling that of a PS3 controller.
Negatives:
- The controller is made from black glossy plastic, which attracts fingerprints. Very easy to wipe clean though.
Buy:-
ZD V Full Vibration Feedback 2.4GHz WIRELESS Controller Gamepad Joystick
ZD V Full Vibration Feedback WIRED Controller Gamepad Joystick


You must be logged in to post a comment.